
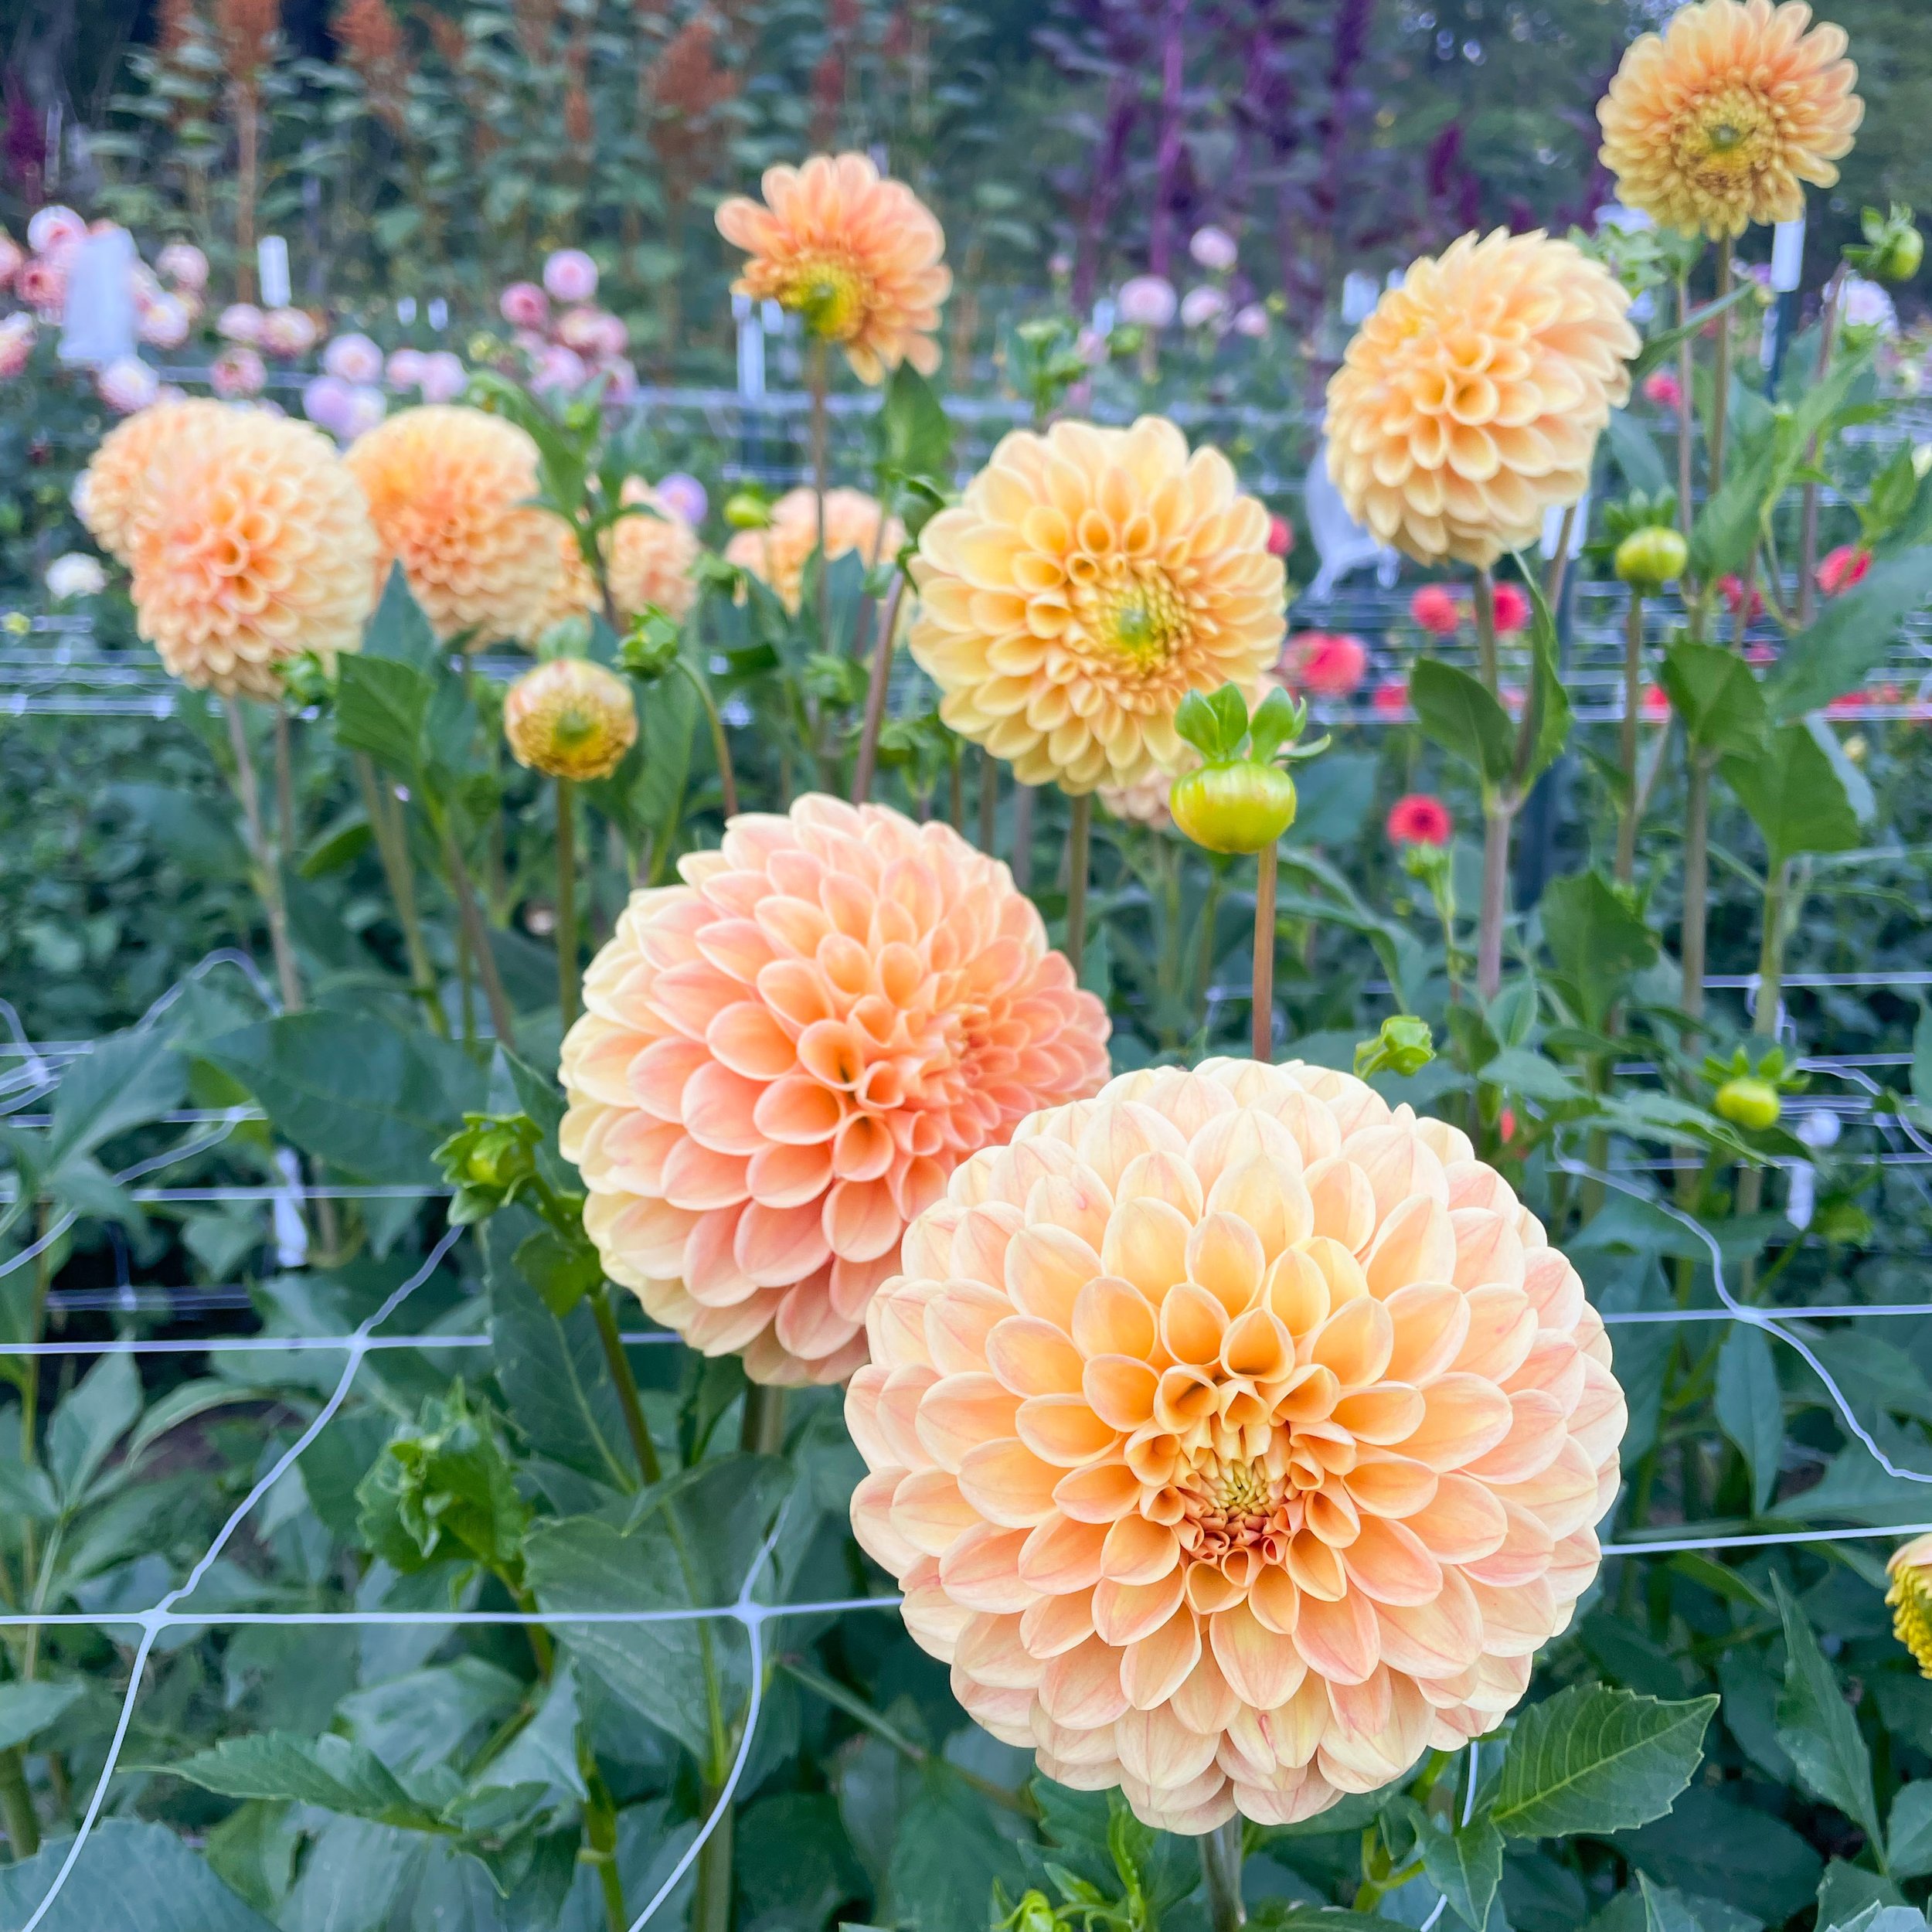
How to Plant + Grow Dahlias From Tubers
Let’s get you on your way to growing beautiful dahlia blooms all summer and fall!
This growing guide will cover how to plant dahlia tubers, plant spacing for the strongest stems, soil tips, pinching dahlias, staking + netting and more. These are my favorite tried and true methods for dahlia success, written by a real human, not a chat bot or click bait generator. I will be adding to this guide over time so be sure to check back for info on dahlia tuber storage, cutting dahlia stems, and more.
Let’s talk about tubers!
While there are a lot of different ways to garden, especially when you factor in different zones and climates, it is my hope that this guide can serve as a guiding hand. Especially if you’re just beginning your dahlia journey. If you’re a more experienced grower maybe there will be a little tidbit of info you will discover. I encourage you to read through this guide knowing that your growing location probably will differ from mine. For example, things like how long it takes for a dahlia to bloom from planting will be standard, but when you actually plant them could be over a month earlier or later than I do. I am located in usda zone 7A in western NC with clay soil that has been amended over time with compost, aged pine fines, and nutrients.

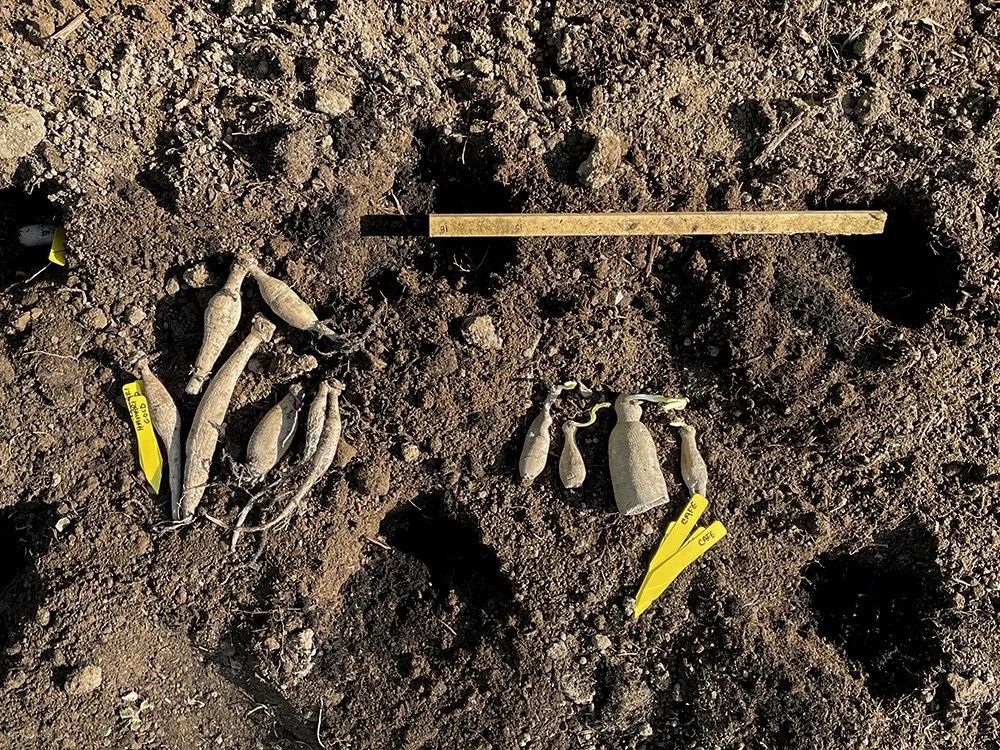
Cafe Mini (aka Jolene)
Clearview Debby
Darcy
Quick Highlights of How to Plant and Grow Dahlias
How should I store tubers before planting?
If you’ve just received tubers in the mail but it’s still too cold to plant you can store them in a warm (50-70°) dark location in your home. Usually tubers arrive in sealed bags to retain moisture. The goal is for them to not dry out but not rot. Checking on them every few days to monitor is ideal.
• When should I plant my dahlia tubers?
Dahlia prefer soil and air temps above 50°F. They are considered a tender perennial in zones 8-10. Some say to wait for soil temps in the 60’s but I have tubers begin to send out roots in cold storage at 43-45°F. Once growth has emerged above the soil, temps below 40°F can damage the cellular structure of the plant.
• How long do dahlias take to bloom?
Dahlias begin to bloom around 120 days from when they begin to sprout (oftentimes in winter storage) and will continue to bloom
until frost
• How much sun should dahlias get?
Full sun is best - aim for 6-8 hours
• How deep should I plant my tubers?
Plant dahlia tubers between 4-6” deep with the eye facing upwards
• How far apart should I plant my dahlia tubers?
Dahlia spacing can vary depending on the size of the variety/plant. As a general guideline, aim for 18”-24” plant spacing.
• What kind of soil do dahlias like?
Dahlias like slightly acidic soil with a pH between 6.5-7.0.
• How much should I water my dahlias after planting tubers?
Unless your soil is bone dry, I would wait to water your tubers until you see top growth emerging. The moisture in the soil is enough to get them started and often spring rains will add more moisture. Too much water before they get established can lead to rot.
• Should I pinch my dahlias?
I would! For the strongest plants, pinch the top of your dahlias when they have 3-4 sets of leaves. This encourages them to send out laterals and more plant = more blooms!
• Do dahlias need to be supported?
Staking is generally recommended either through corralling with twine or using horizontal netting.
Keep reading below for more detailed information!
Tuber Eyes + Shape
Identifying Dahlia Eyes
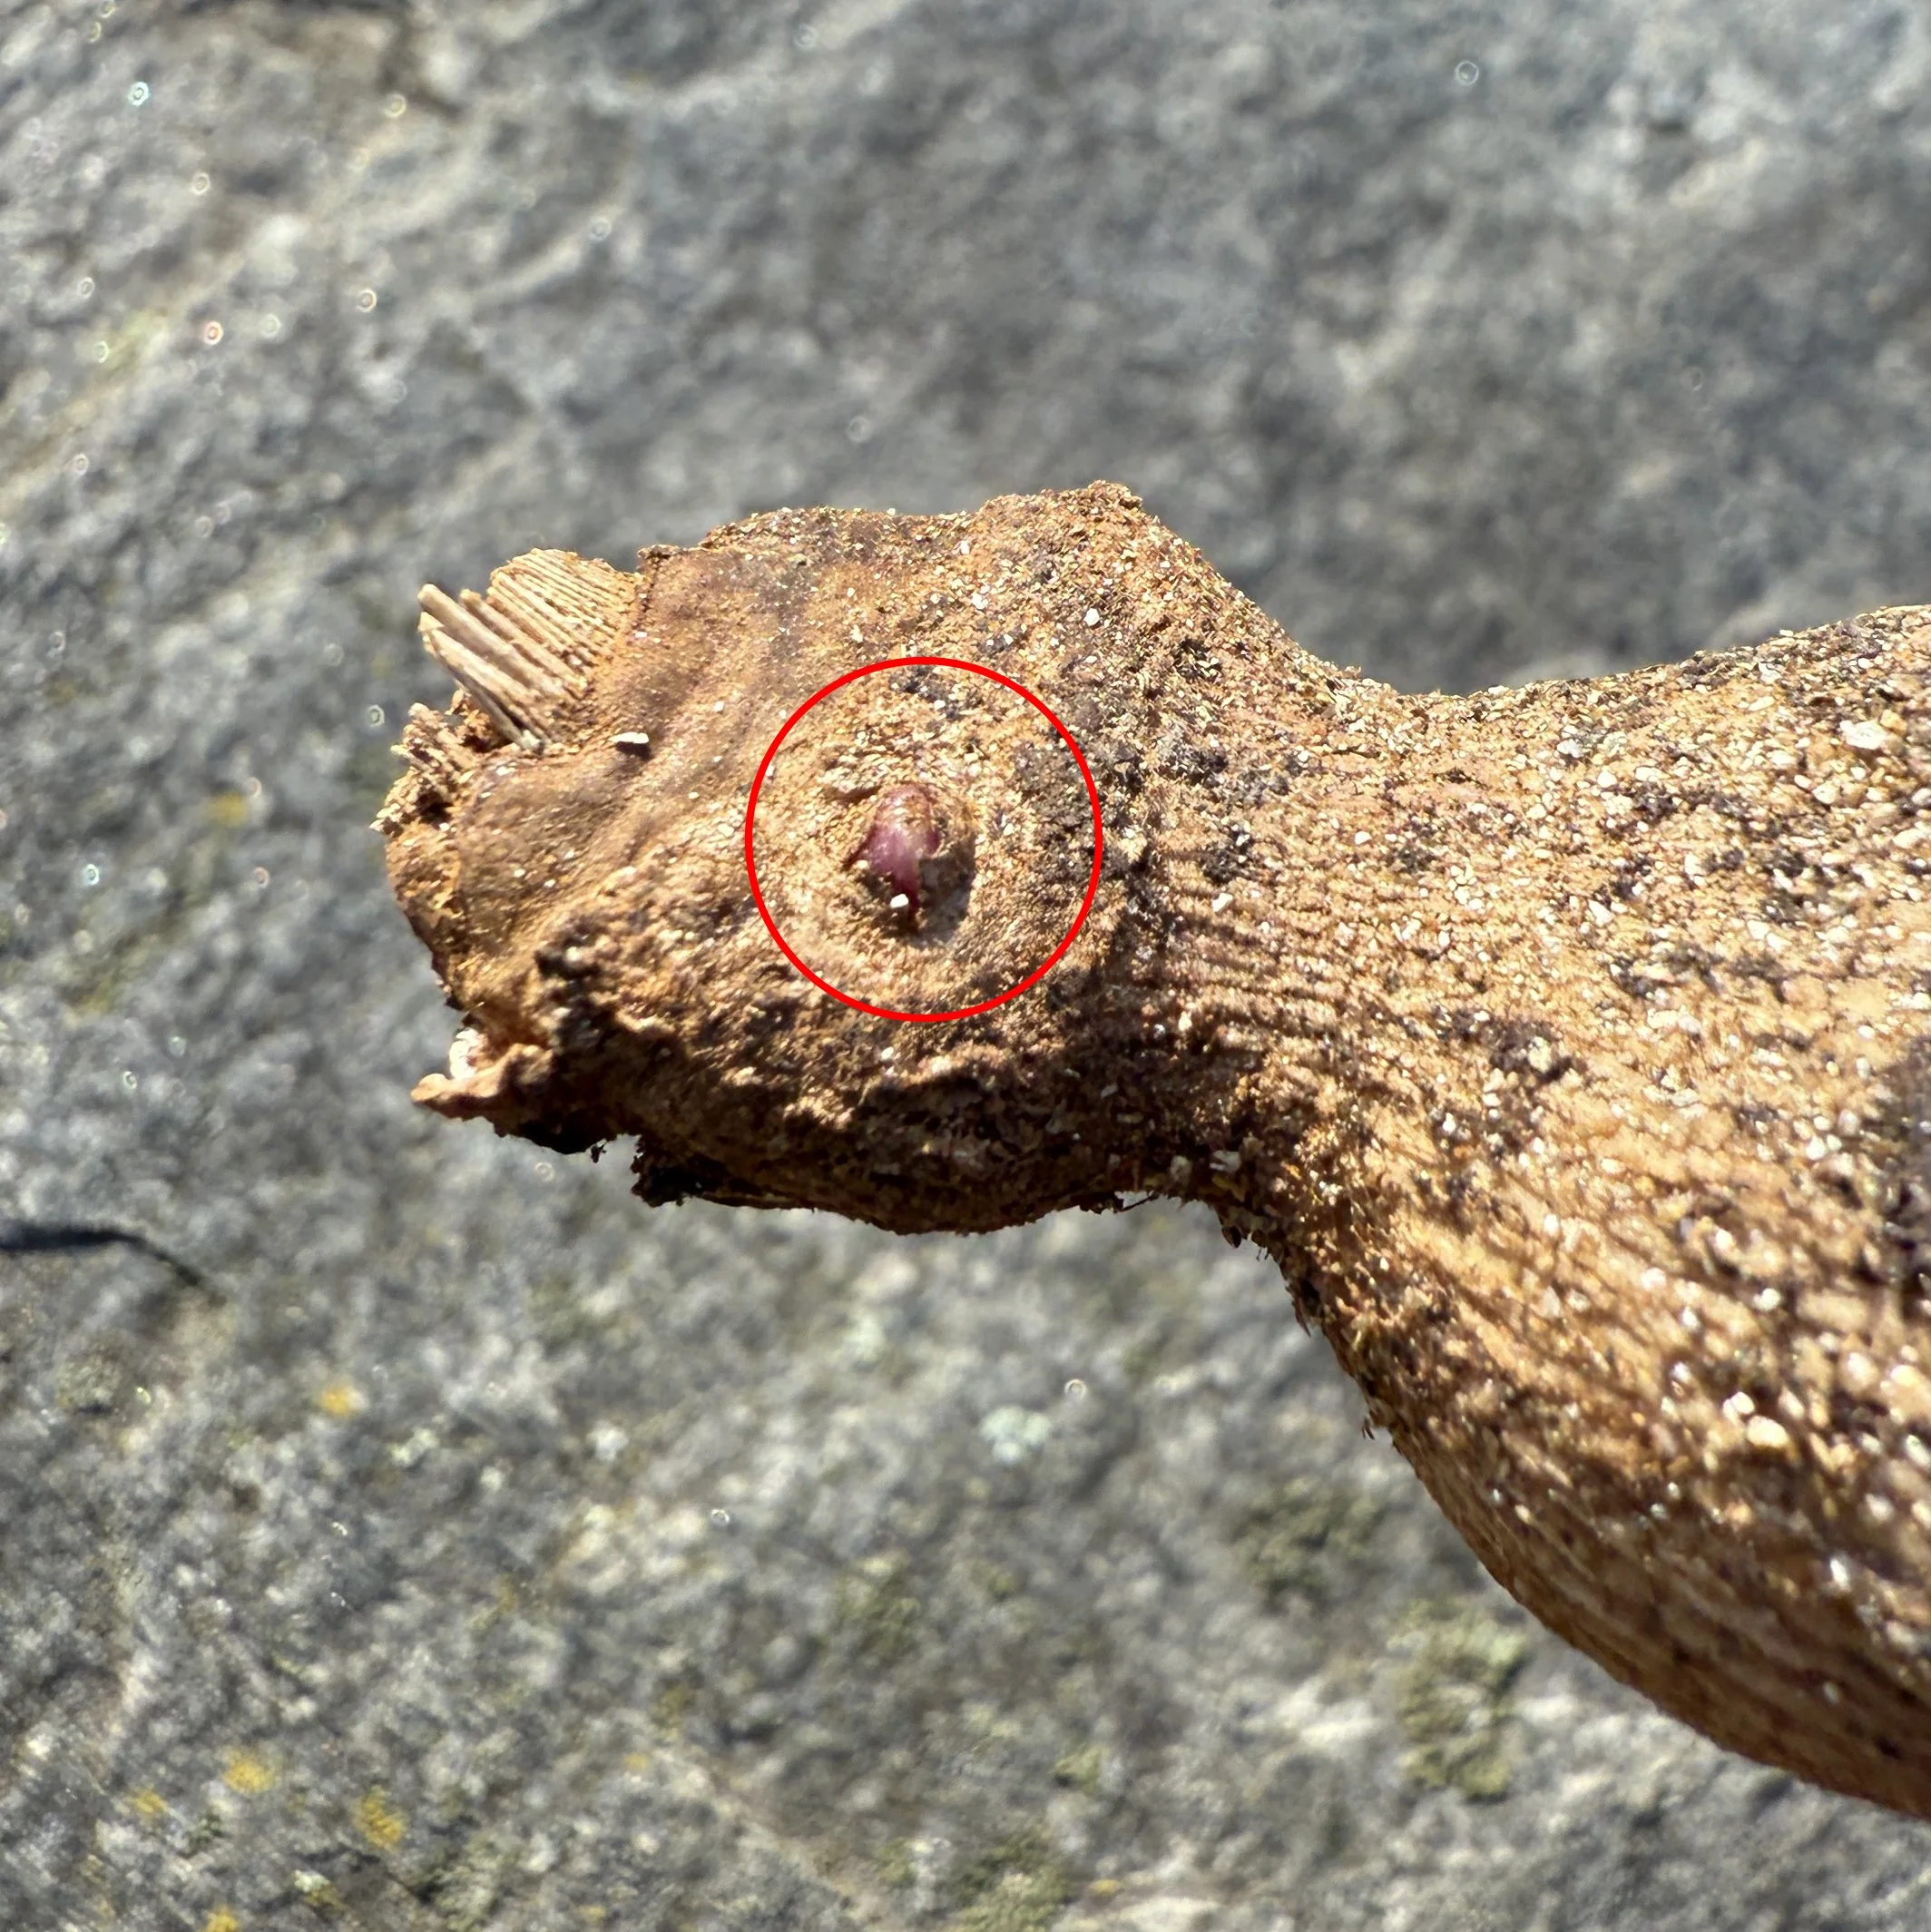
If you’re just starting out with dahlias, it can be tricky to tell what is an eye and what is just a bump. Dahlia tubers, just like potatoes have eyes which will then sprout to become the plant. Dahlia eyes will typically grow on the “crown” of the tuber (sometimes on the mother stem). Not every tuber will have an eye - these are referred to as blind tubers. Below are some images with eyes circled in red to help learn how to spot an eye.
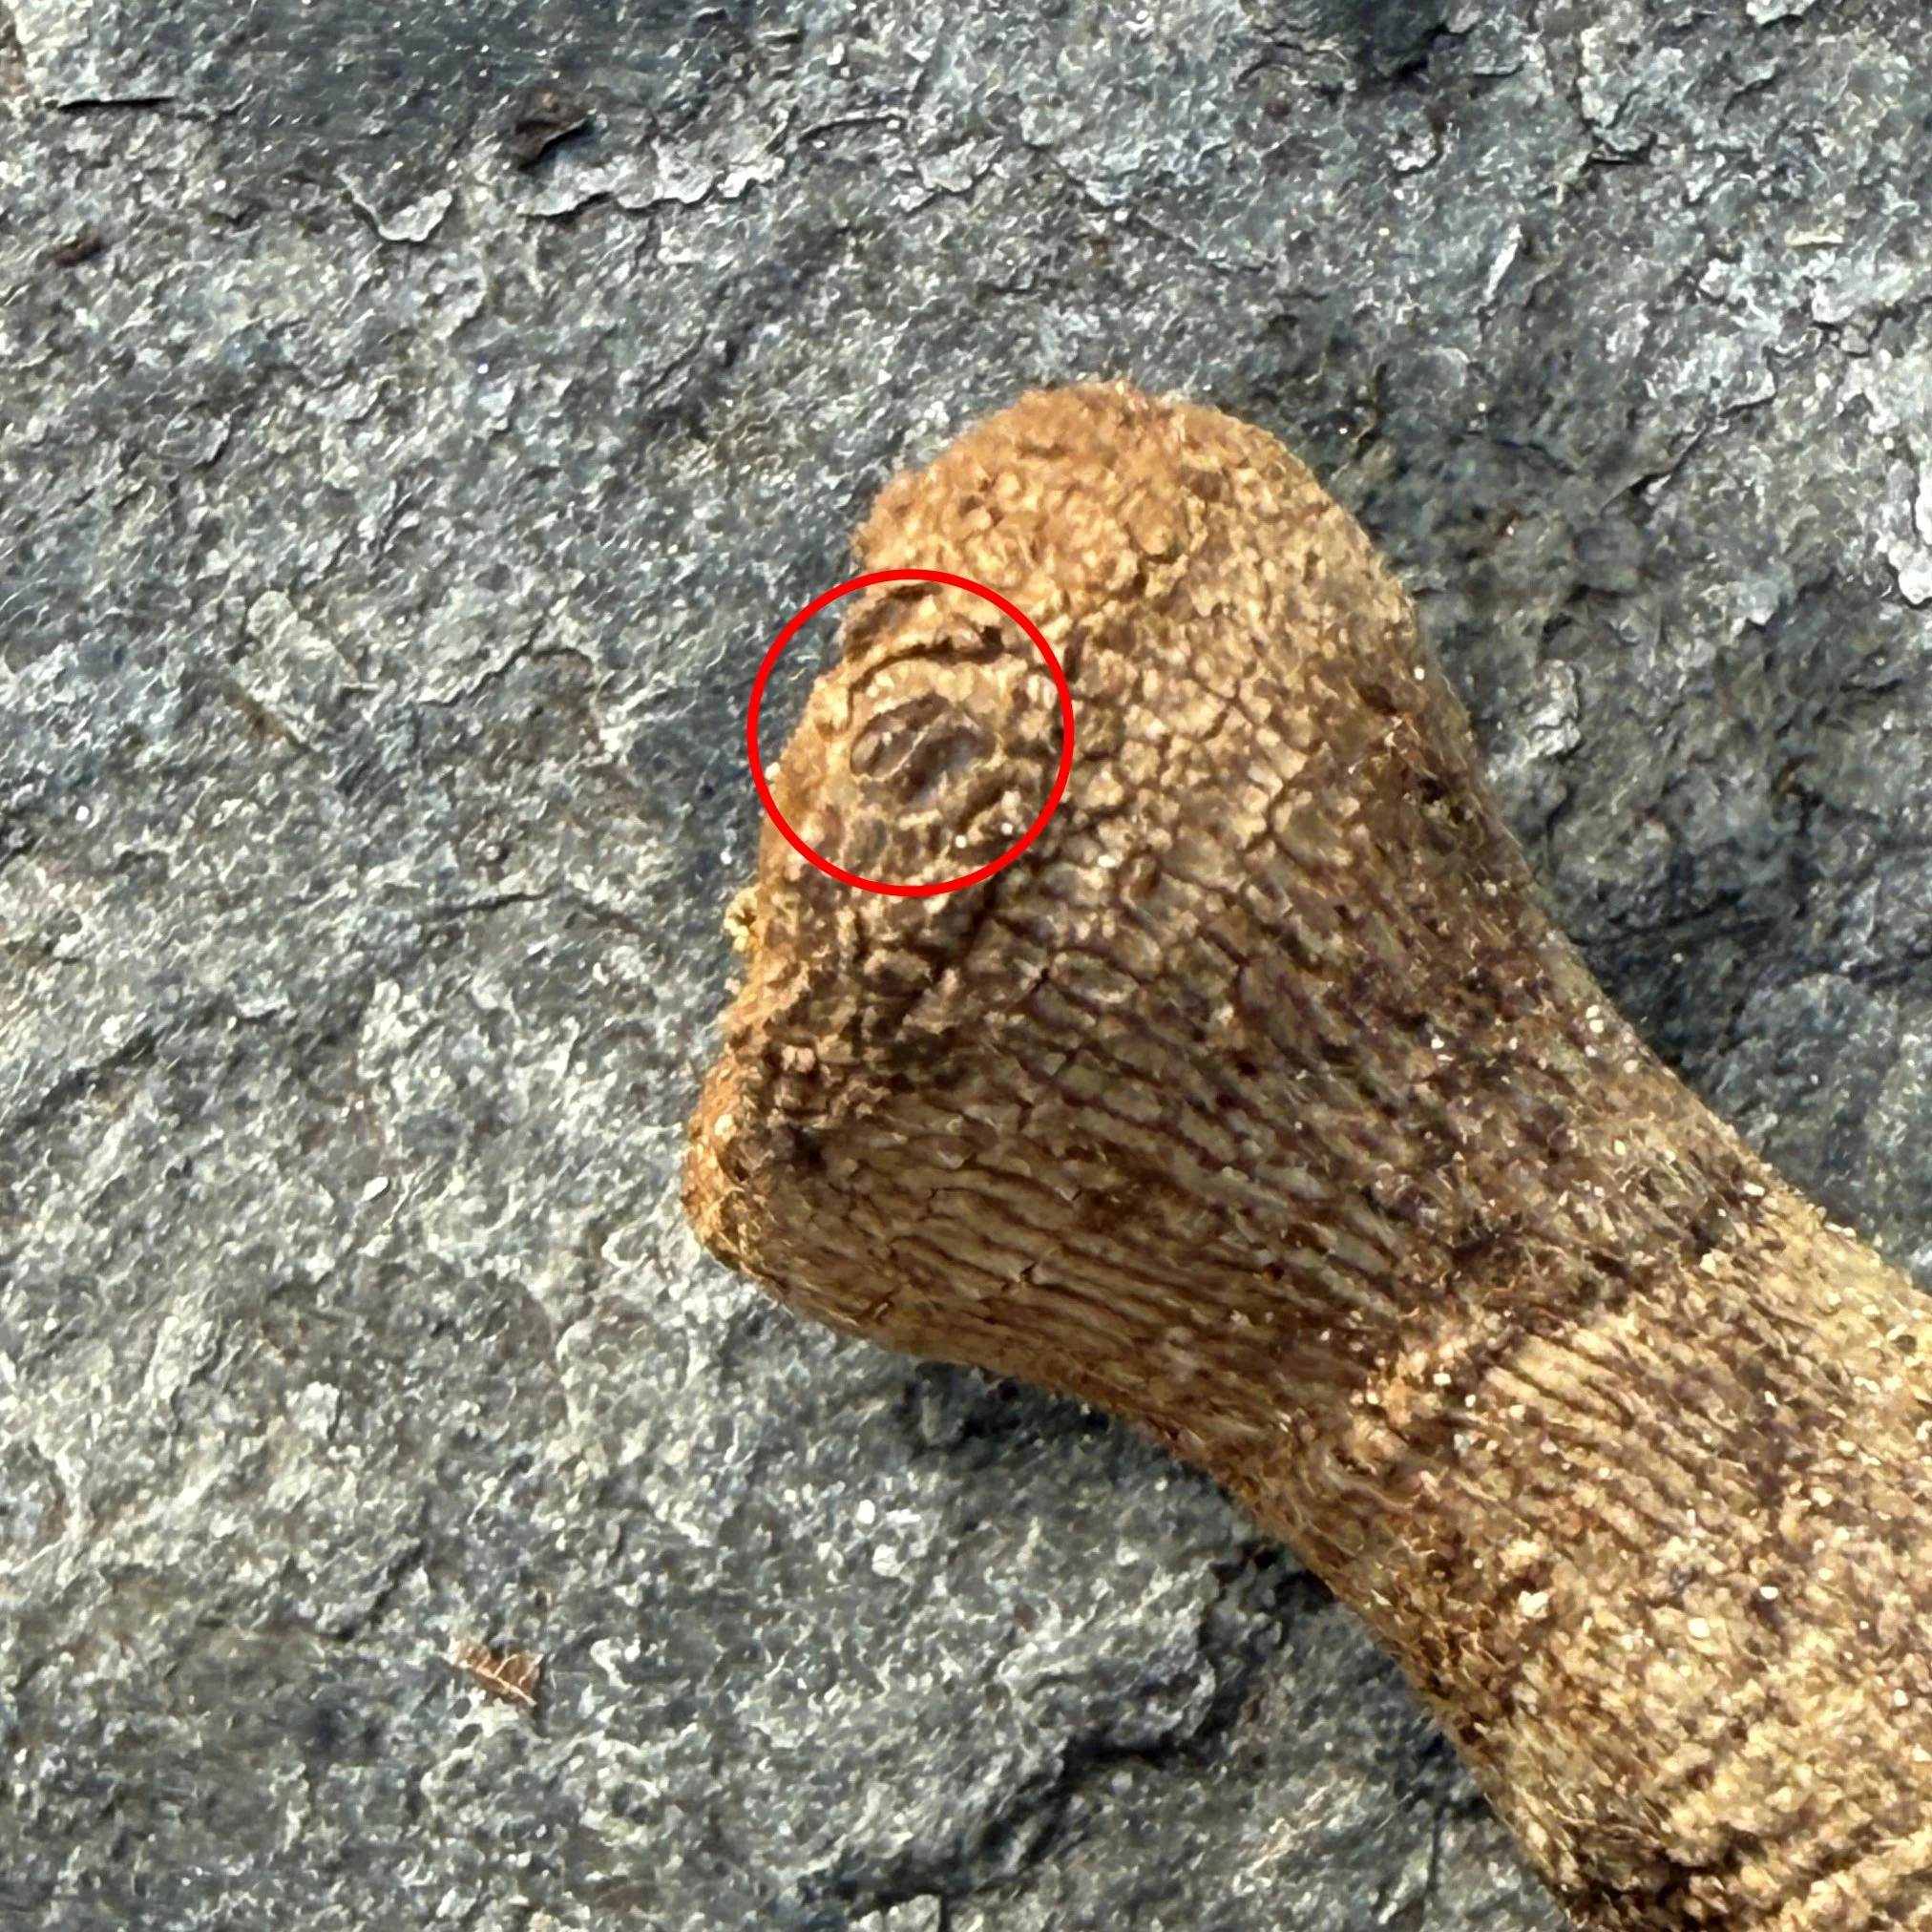
A single emerging eye
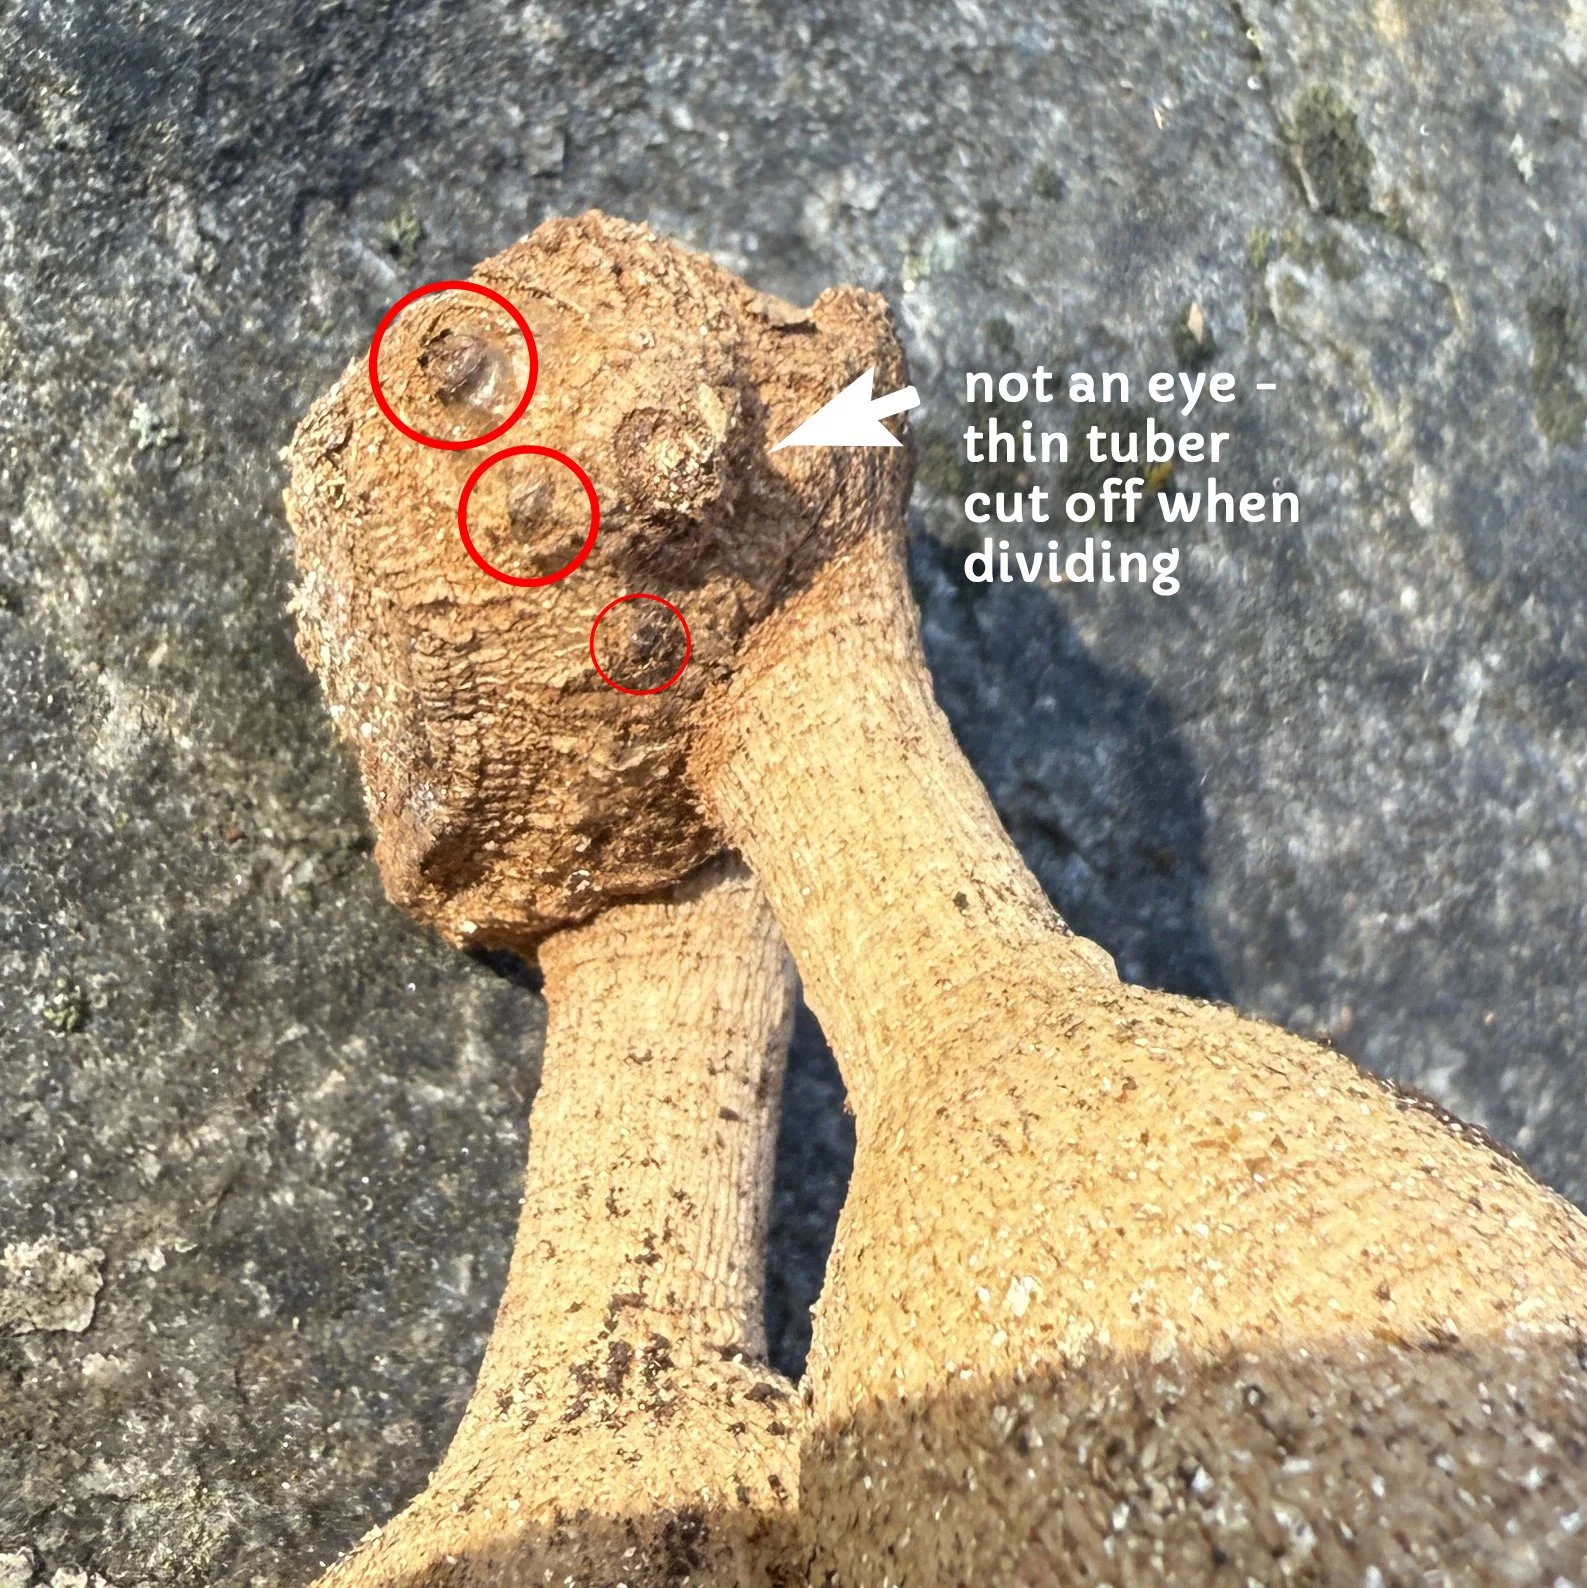
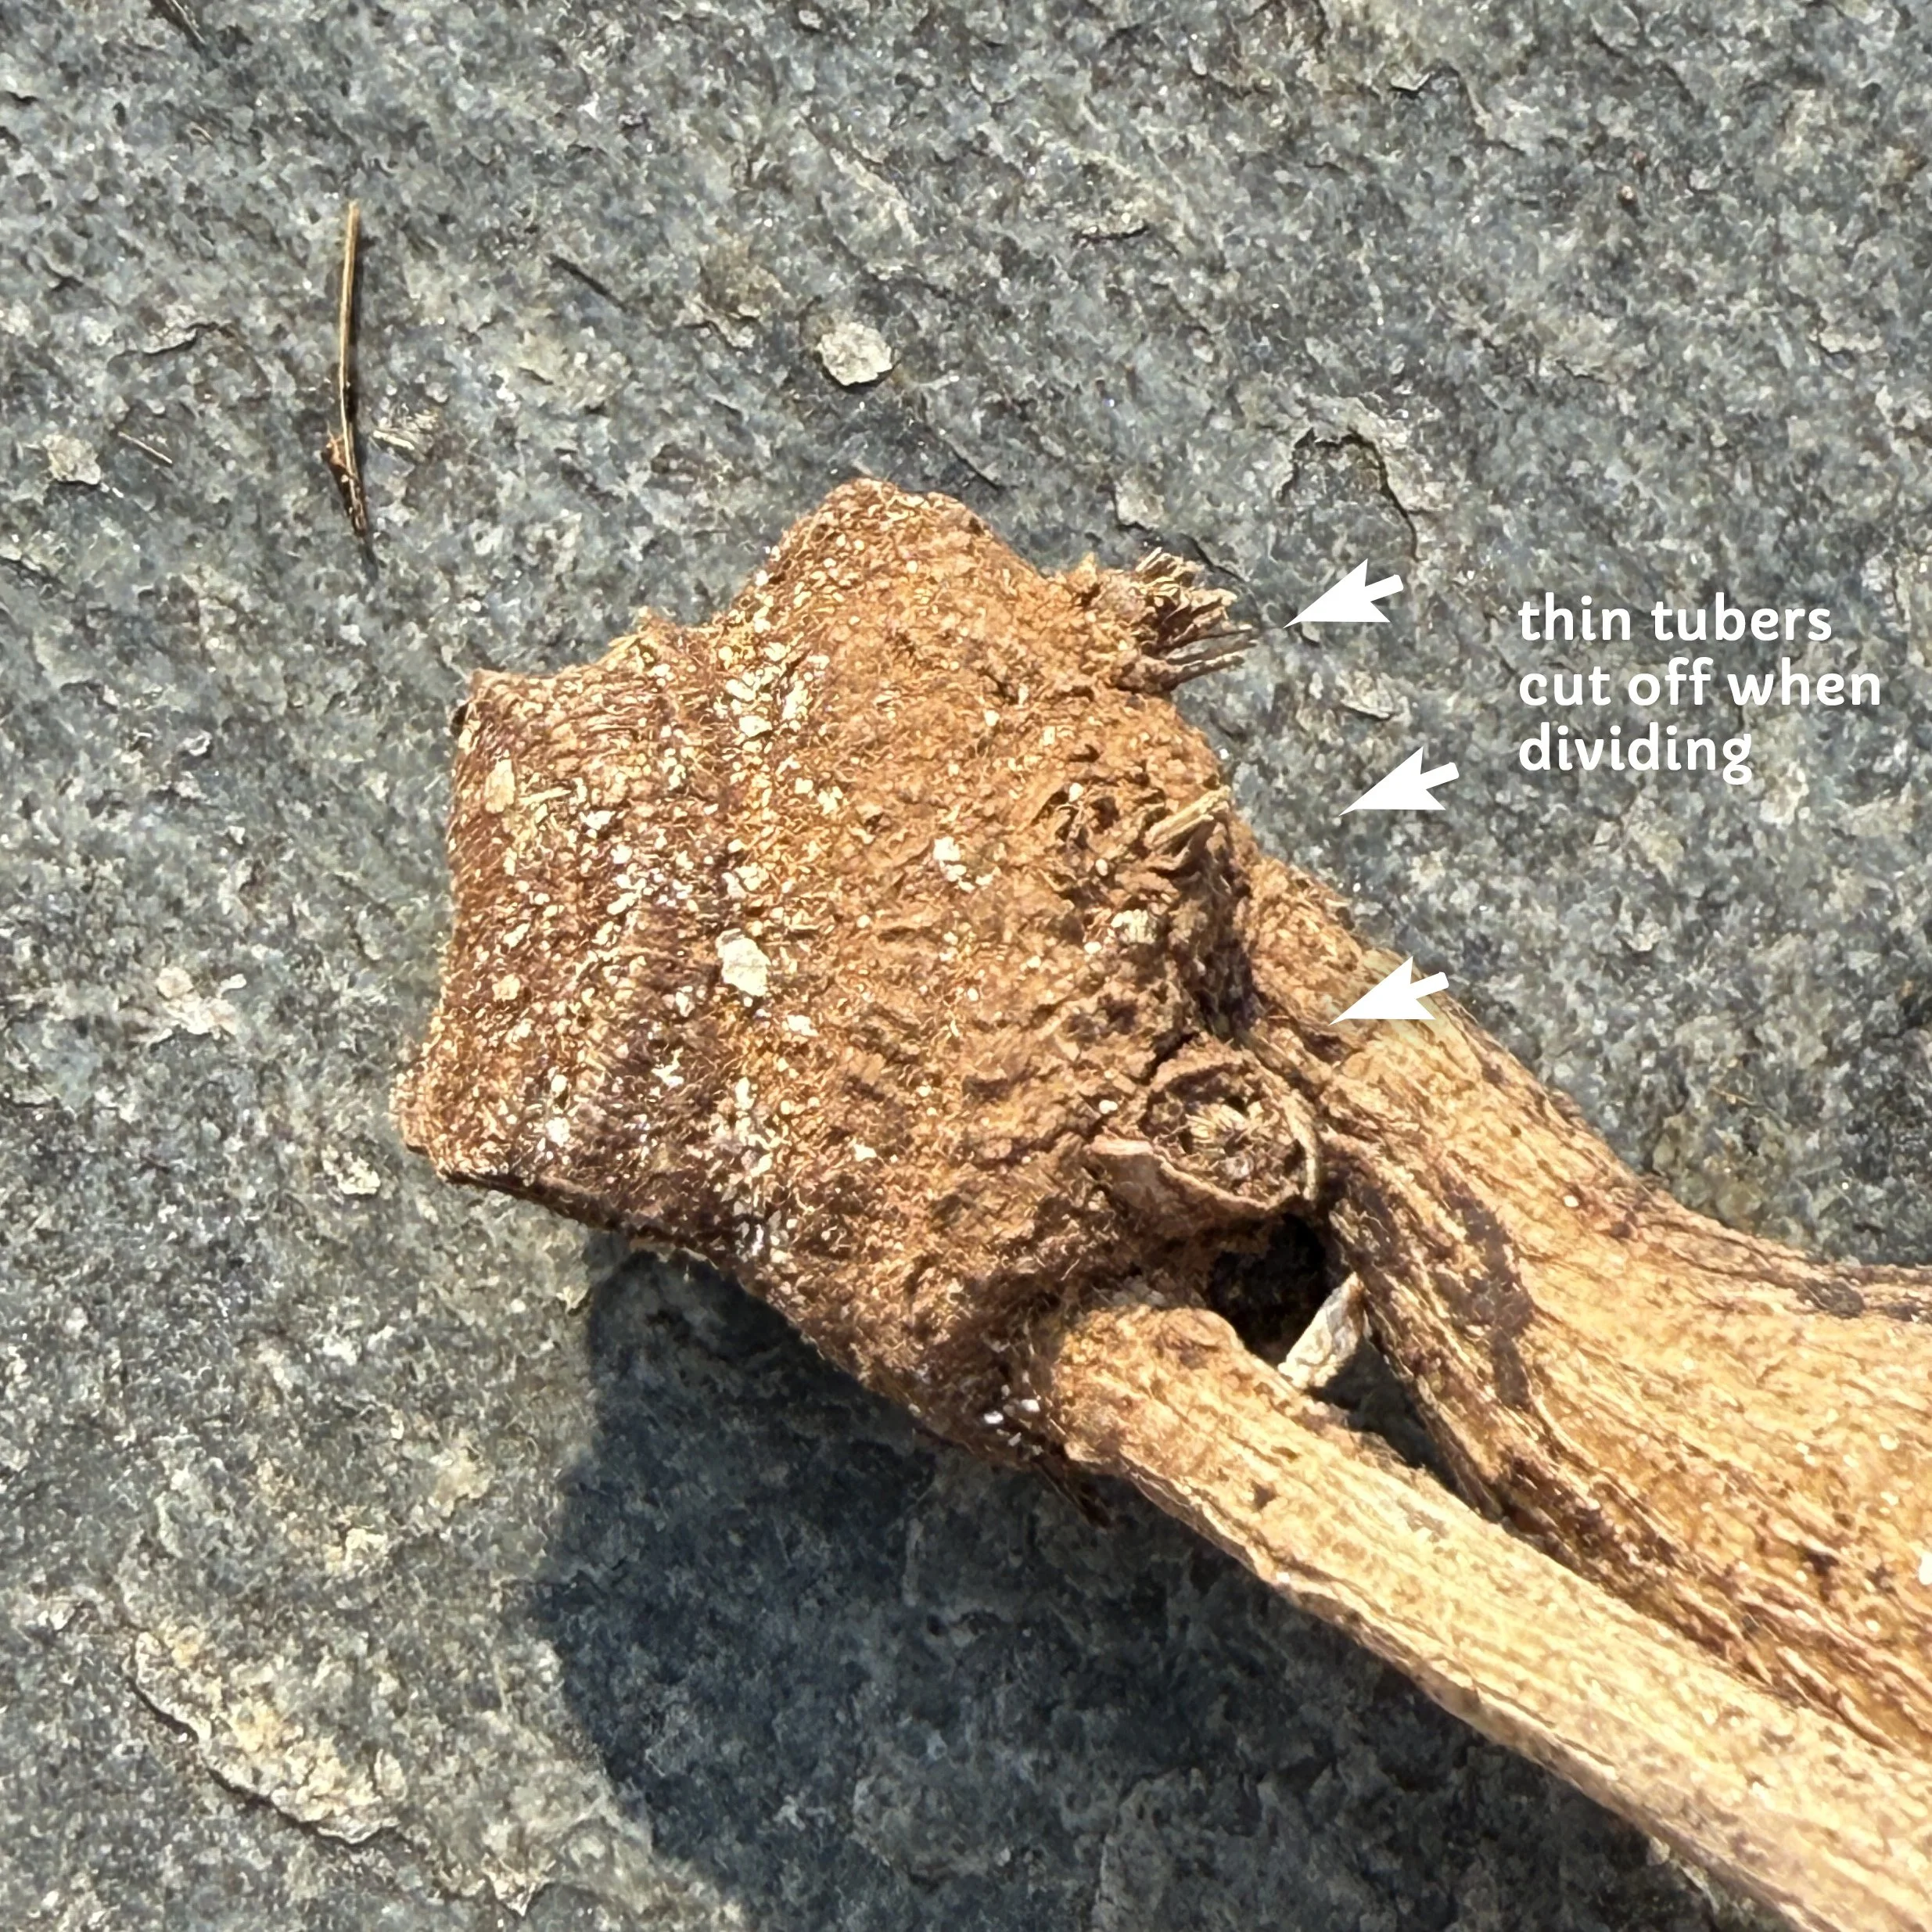
A tuber clump with two tubers and three eyes
An emerging sprout
A blind tuber clump with no eyes
Waking Up Tubers
If your tubers have been in winter storage and you have a shorter growing season, you can “wake up” your tubers by placing them in a warmer location where temps are 60-70°F. This can be as much as moving them from a cellar to inside your house. There is a method some growers prefer where tubers are placed inside ziplock bags or small lidded containers with a small amount of moist (not wet) soil. This will mimic them being planted and they should start sending out feeder roots within a week or so. Some varieties are slower to wake so be sure to monitor for rot. For my practice, I simply move my storage boxes from cold storage to a warmer location for about a month before planting. I will briefly touch on tuber storage further down in this growing guide but it’s really deserving of it’s own blog since there are many methods.
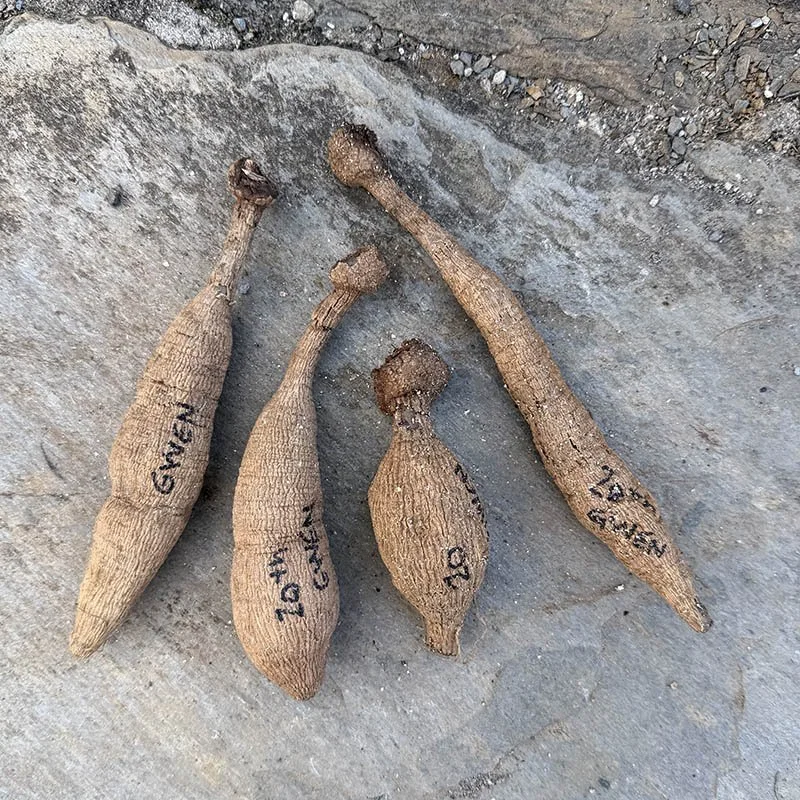
Tuber Variation
Tuber size and shape can vary wildly, even between tubers that came from the same clump. Just like personality traits, the genetics of different cultivars of dahlias will produce differently shaped and sized tubers. This is also true for how tubers store overwinter. Some varieties do not store well overwinter or are more prone to rot while some show no signs of either.
Things to Consider Before Planting: location, drainage, and soil health
Timing + Location + Drainage
Dahlias are native to Mexico and Central America and thus appreciate full sun! Aiming for a spot that receives 6-8 hours is ideal. If they receive less sun, you might notice more spindly growth and poor blooming. In really hot climates, plant them in an area that will receive afternoon shade.
As I mentioned in the overview above, dahlias appreciate soil and air temps no lower than 50°F with no threat of spring frosts. For me, this timing is generally around mid-may. Mother’s day has always been my marker of planting time but as the earth warms, this is shifting to early May.
When thinking about where you will plant, take into consideration the drainage. Too wet and you risk tubers rotting before rooting or even once they are growing. Time your planting window where you won’t be receiving multiple days of rain in a row.
Soil Nutrients
Dahlias like a slightly acidic soil with a pH level of 6.5-7.0. Soil health and nutrients are often overlooked when planting. I highly recommend contacting your local agricultural extension office and ordering a soil test. Most often, they are free in the off seasons or very low cost at peak times. A quick call to the office and usually someone will help you read the results. This will give you so much insight into things you might not notice until your plants start growing (or not growing if the nutrients are off).
You can also grow dahlias in raised beds, large containers, or even grow bags! I will go into more depth on sizes of containers in the next section but the idea is the same as in the ground plantings. Just make sure you have a good soil mix (look for a raised bed mix, not just potting soil) and good drainage.
Setting yourself up for growing success no matter how many plants you have is key!
Planting Dahlia Tubers: planting depth + spacing and growing in containers
A few quick notes about planting:
• Tubers get planted horizontally in the planting hole with the eye facing upwards
• Don’t water in! Unless your soil is bone dry with no rain in the forecast, I don’t recommend watering in your tubers after planting. They need time to send out feeder roots in the warm soil.
Dahlia Planting Depth
Dahlias are generally planted 4”-6” deep with the eye facing up (more on this below), regardless of if you are planting in ground, in raised beds or in pots/containers. I tend to plant right in the middle, around 5”. If you plant shallow to the surface, the tubers can dry out if watering is inconsistent. Planting deeper also allows the sprout to produce roots to anchor the plant as it grows taller.
Plant + Row Spacing
Some things to consider when spacing out your dahlias side to side are airflow, access to the plants for harvesting and maintenance, and characteristics of the varieties themselves.
Aiming for 18-24” spacing is a great place to start for dahlia spacing. You want to allow enough space for the plants to branch out while not crowding out the surrounding plants. Taking into account the variety size and growth habit is helpful in this regard. I tend to push my plantings much closer together for cut flower production. Over the years I’ve figured out that 12”-14” spacing for mid-size varieties works while I give the bigger varieties a couple extra inches. There are a few things to note when doing this - you will have to maintain the canopy of the plants by removing the bottom leaves of the plants as they grow. I do this 3-4 times during the season. Airflow within the plant and near the soil line are very important factors to mitigate fungal diseases such as powdery mildew.
Think about factors such as will you be planting in rows? Are you planting in a shaped bed? Can you access the plants from both sides? If row planting, try doing just two rows of plants per bed. Your row spacing can be similar to your plant side to side spacing or it can be a little narrower. So let’s say you spaced your dahlias side to side at 24”, you could have your rows spaced at 16”-18”. This can absolutely be what works best for your garden space and might take a year or two of growing to figure out what you like.
Growing Dahlias in Containers
Yes! It is possible to grow dahlias in pots! This can be a great way to enjoy dahlias without access to land or to enjoy them on a patio or balcony. If choosing between a ceramic pot or a grow bag, I would choose a grow bag. They allow airflow into the roots which is great for root and soil health plus drainage. Grow bags can allow a ton of flexibility for your garden! I’ve used grow bags for dahlias at the end of rows when I ran out of room but had just a few more to get in. I would recommend grow bags between 5-7 gallons. For pompon, or mini ball varieties or plants that you know are smaller, 5 gallon would probably be fine. For larger dahlias, opt for 7 gallons. Dinnerplate dahlias or very vigorous growers, 10 gallon might be the move.
My dahlia tubers are planted, now what?
Let’s get some support in place!
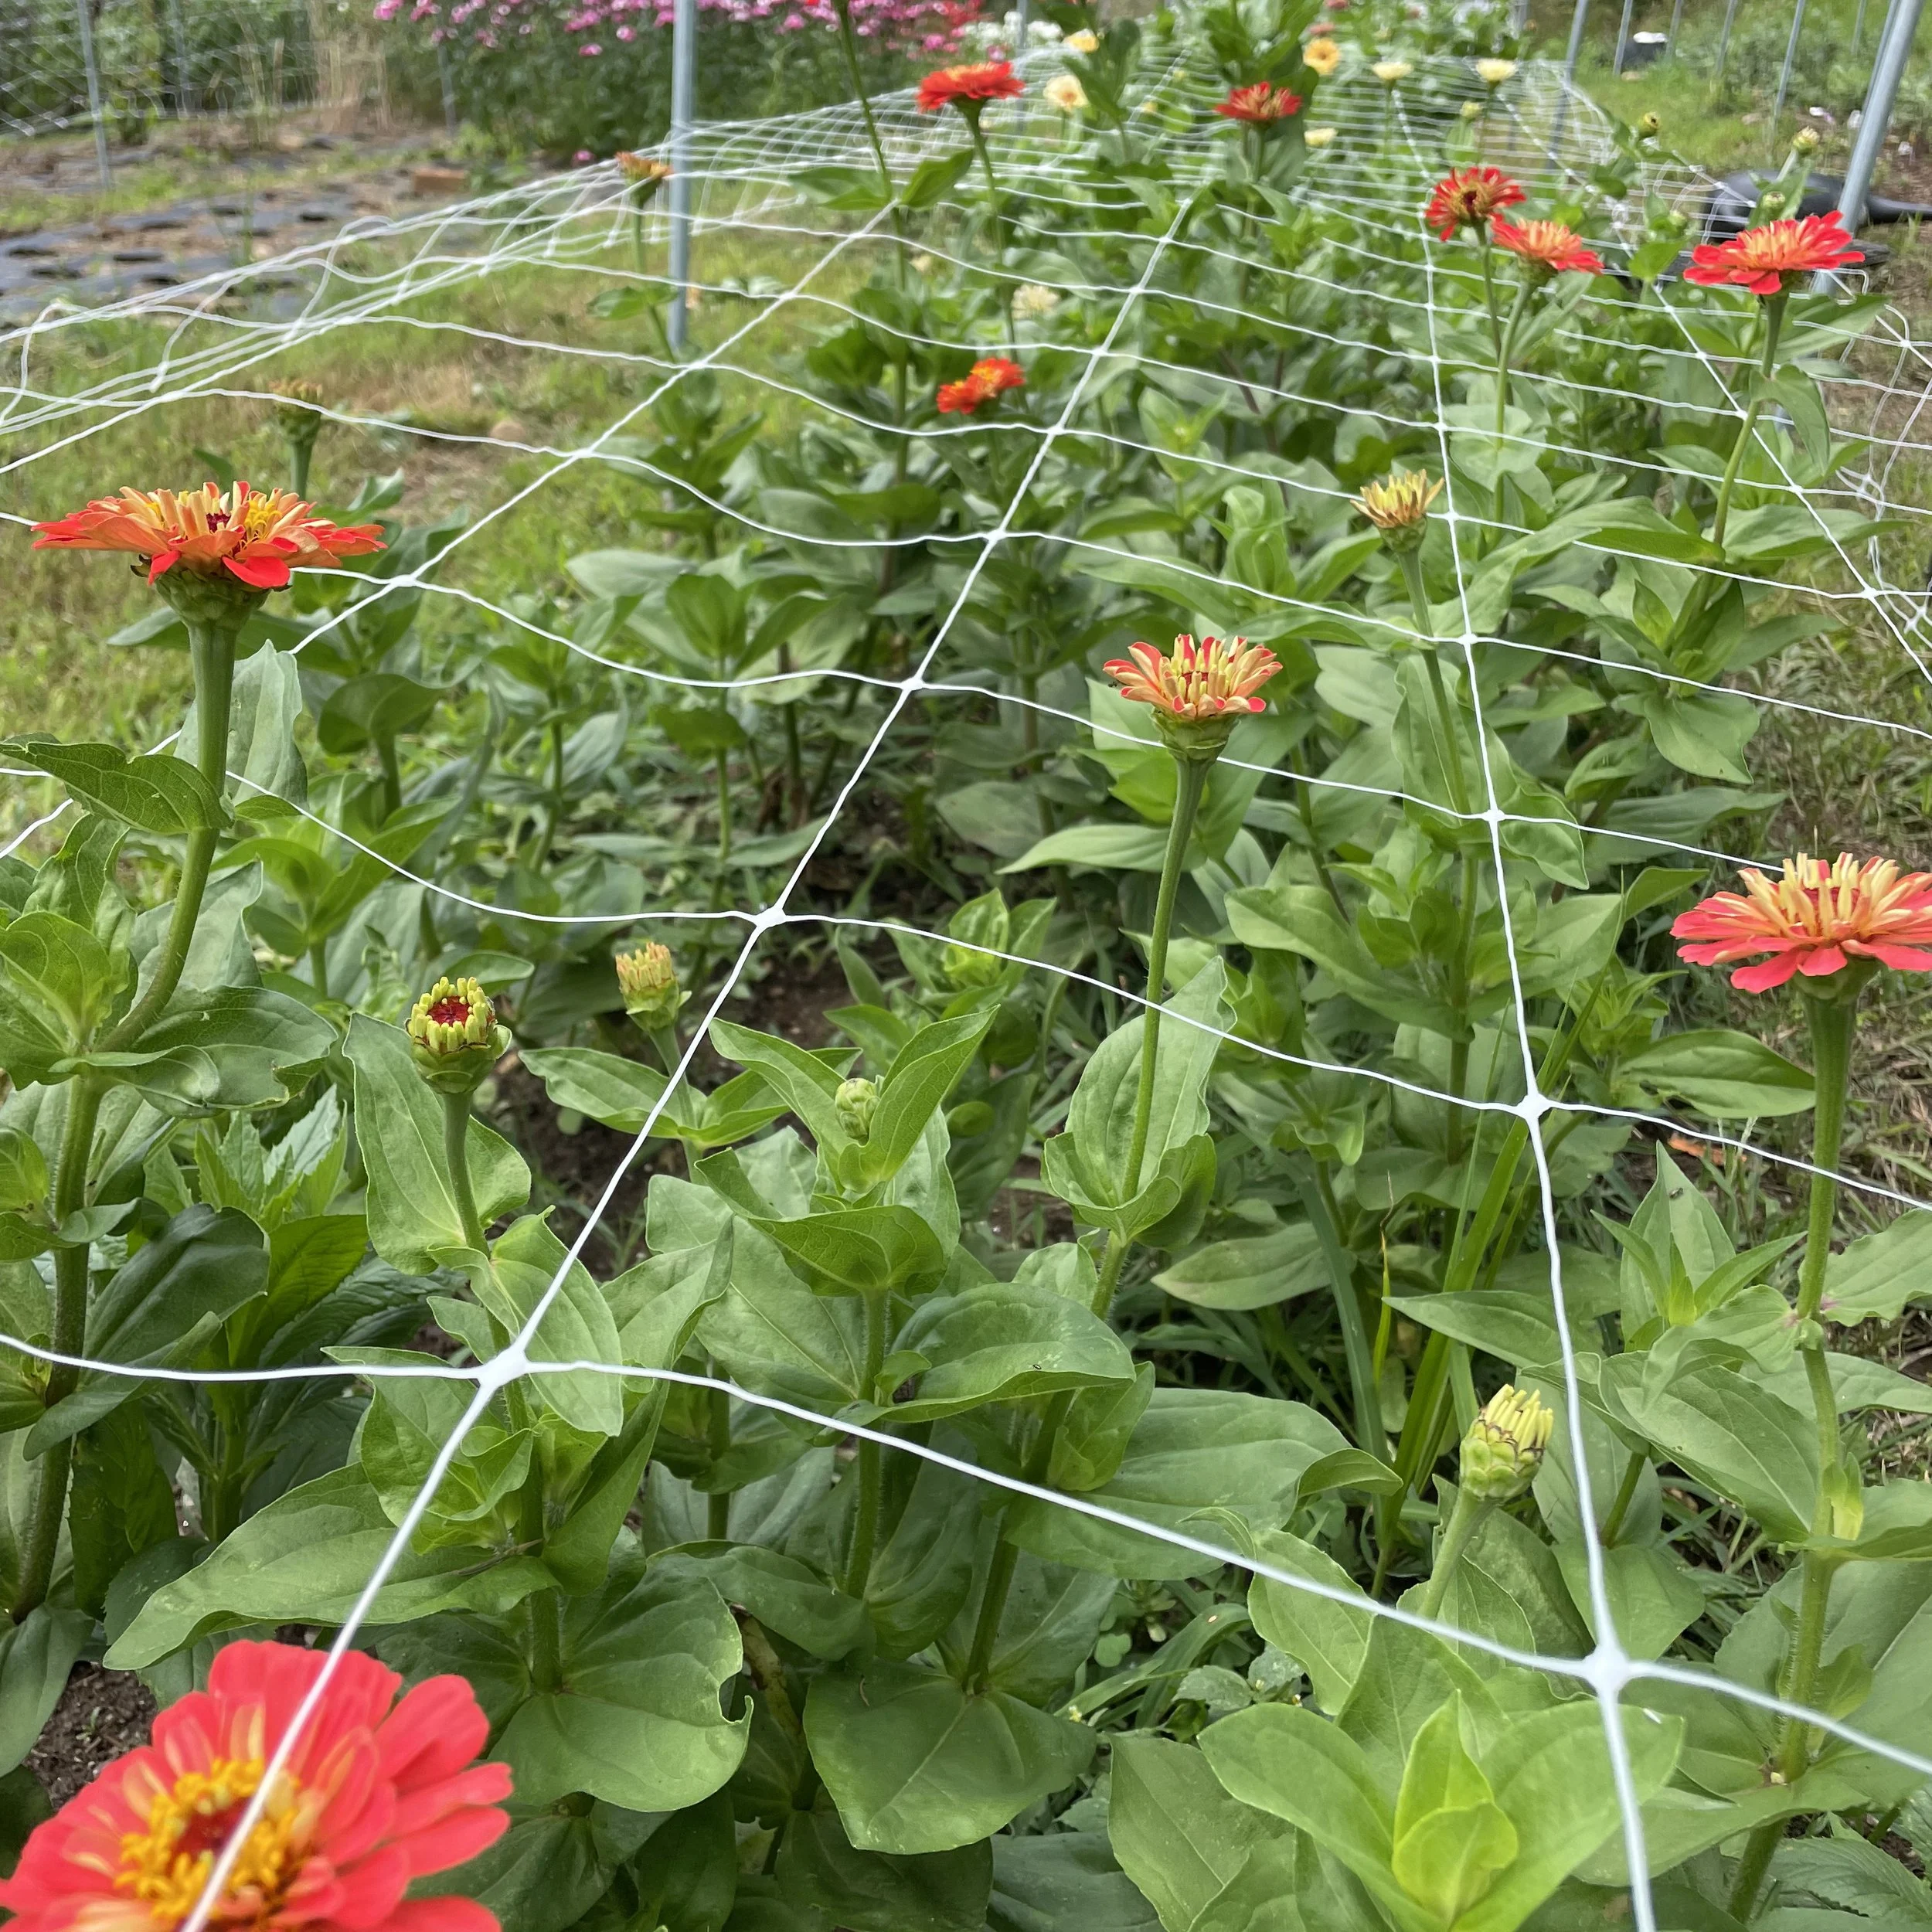
A close up of Hortonova netting on a row of zinnia. I use this for all cut flower crops that require support or to ensure straighter stems.
Staking: horizontal netting, corraling, and single stake options
There are numerous ways to stake your dahlias. I will try to go over a few pro’s and con’s of each method.
Hortonova netting stretched horizontally with t-posts is what I use in my field. It comes in different widths to work with your row sizes. Pros: supports each branch in close proximity as the squares are only 4” wide, reusable, can double layer for taller plants. Cons: Can be annoying to remove plants at the end of the season. My allegiance to hortonova for staking dahlias was solidified after hurricane Helene in 2024. While the tops of the plants above the netting we’re broken from the 90 mph wind gusts, the double layer of hortonova kept the bottom 4’-5’ of the plants upright enough to salvage what I could of the tubers that didn’t rot from the 27” of rain that fell in 2 days. While it is a plastic material, I am able to get quite a few seasons out of each piece. Just be cautious when you are cutting blooms, especially if you’re deep in a plant, not to nick the netting. While it won’t unravel, you will lose that square of support.
If you’d like to avoid plastics, you can corral your dahlias with twine. There are several great videos on this method but I recommend checking out this video by Kristine Albrecht of Santa Cruz Dahlias. Since I have never used this method I can not speak to the pro’s but a con for me is that the plants are supporting each other and as they grow upward, the stems can curve if the plant isn’t supported well.
Individually staking each plant is also an option. Just be sure to add your stake at planting time so you don’t pierce through your tuber after planting. The stake should be within 4” or so to where the sprout will emerge so that you can secure it to the stake as it grows. This is a great method for growing in containers. Running the stake all the way to the bottom of your container will provide the most support. You could also use multiple stakes around the inside edge of the container and use twine for more support.
Growing on
After about 2 weeks or less from planting you should start seeing green growth push through the soil! Depending on temps and moisture this time could vary.
Mulching
I personally don’t mulch my dahlias as we receive quite a bit of rain during the summer months. I usually only have to weed once or twice until the canopy shades out anything trying to grow. If you are in a very arid or hot climate, mulching might be great to keep your soil cooler and retain moisture. Aged pine bark or straw (make sure it isn’t hay with seeds) works well!
If you are using plastic ground cover (such as DeWitt Landscape Fabric) or a biofilm, you will want to have this down before planting and burn holes to plant into. I don’t recommend cloth/fabric ground cover that is often used under mulch or rocks.
Pinching Dahlias
Once your dahlias have put on some good growth, it’s time to pinch! Pinching means taking out the top growth to encourage the plant to send energy into the side laterals, resulting in more stems, a sturdier plant, and more blooms. The only dahlias I don’t pinch are seedlings as I want to see the bloom quicker to see if it’s a keeper. If you don’t pinch, the plant can be much leggier and it will take longer to get multiple blooms.
Pinching can seem intimidating at first but it’s really quite simple. After the plant has developed 3-4 sets of leaves above the soil line, just take your fingers on the top growth above the set of leaves and gently “snap” out the center growth. You can also cut it with snips but be sure to sanitize them between cuts to mitigate any potential disease. By snapping the growth, you aren’t coming in contact with the plant in the same way.
Fertilizing
There are many methods for feeding nutrients to dahlias. I usually wait until after I have pinched the plants to establish a feeding schedule. While they are growing green growth and before buds have started setting, I use an organic fish emulsion or nitrogen focused organic fertilizer. I also make my own compost tea and supplement with fish emulsion.
Once you see even the slightest hint of buds starting to develop, you should switch to a bloom focused fertilizer. My personal favorite is Fox Farm Big Bloom.
More info coming soon:
Cutting Blooms and Sanitation Practices
End of Season Care
Lifting Tubers and Dahlia Tuber Winter Storage
I hope this guide has been helpful! Wishing you beautiful dahlia blooms!
Let me know what other growing guides and topics you’d like to read about!
SCF’s Favorite Dahlia Planting and Growing Supplies
Below are links to some preferred supplies. These are not affiliate links and I prefer to shop small when possible so I encourage you to support your local nursery or farm supply stores. I realize it’s not always possible for some supplies but shopping small is important and invaluable for sustainable agriculture and community.
Dahlia Tubers
• Our dahlia tuber sale happens annually in late winter. Be sure to sign up for our newsletter at the bottom of any page to stay in the know for tuber sale dates, restocks, and dahlia seed sales.
• DahliaAddict.com is a great resource to locate specific varieties
• Getting involved in your local dahlia societies is also a great way to meet other growers and often times trade tubers!
General Supplies
• Tenax Hortonova Netting - this is a link to the 48” wide version
• DeWitt Woven Ground Cover
• Grow Bags for Dahlias
Fertilizers
• Brown’s Fish Emulsion
• Fox Farm Big Bloom Flowering Fertilizer
use the arrow in the bottom right to jump back to the top!